Followers

Sunday 12 January 2014

First Decent Nail Stamping Attempt

Good afternoon everyone!  Hope everyone has enjoyed their weekend so far.  Today I bring you another nail art mani I did.  This time I tried stamping!  I bought a cheap set from Dollarama a while back just to try it out, I think it was an As Seen on TV set.  I had never stamped before and didn't want to spend a fortune to try it out, as I hear it can get expensive.  So with my "resolution" to try to do more nail art this year, I sat down one night and tried my cheap stamping set out.  I had tried it long ago when I first got it but didn't give it much of a shot and I think perhaps the polishes I tried with weren't stamping friendly or something and it was an epic fail.  This time I had put more research into how to stamp properly and what products to use and I was bound and determined to make it work.  One of the plates that came in my set was a plate of 6 "full nail" designs.  I say "full nail" because they are so narrow that unless you have the tiniest nails, they would never cover the full nail.  They would cover my full pinky but that would be about it.  So I thought I'd get creative and try one using it at an angle, and it kind of worked, although placement was a bit tricky.  And I used just a moon and stars single design from one of the other plates for the accent nails.

The products I used for this nail art were:

-OPI DS Magic (used as base for stamping on)
-butter LONDON West End Wonderland (used as base for stamping on accent nails)
-Mrs. P's Nail Potions Fawning For You (used for stamping)
-Color Club Revvolution (used for stamping on accent nails)


So I first applied 2 coats of OPI DS Magic on majority of my nails and 2 coats of butter LONDON West End Wonderland on my accent nails.  I then applied a coat of Seche Vite Dry Fast Topcoat on all nails to make sure the nails were good and dry and especially the accent nails with the glitter were smooth for optimal stamping results.

I then stamped my "full nail" images on the diagonal over the DS Magic using Fawning For You.  Then I stamped the individual image over the West End Wonderland using Revvolution.  The individual image was just a moon with a couple of stars.  In order to fill the nails more I also used partials of the image to put more individual stars on the nails.  I then topped everything off with another coat of SV and was done.  I was quite happy with how successful the stamping turned out and I liked the colour combination.


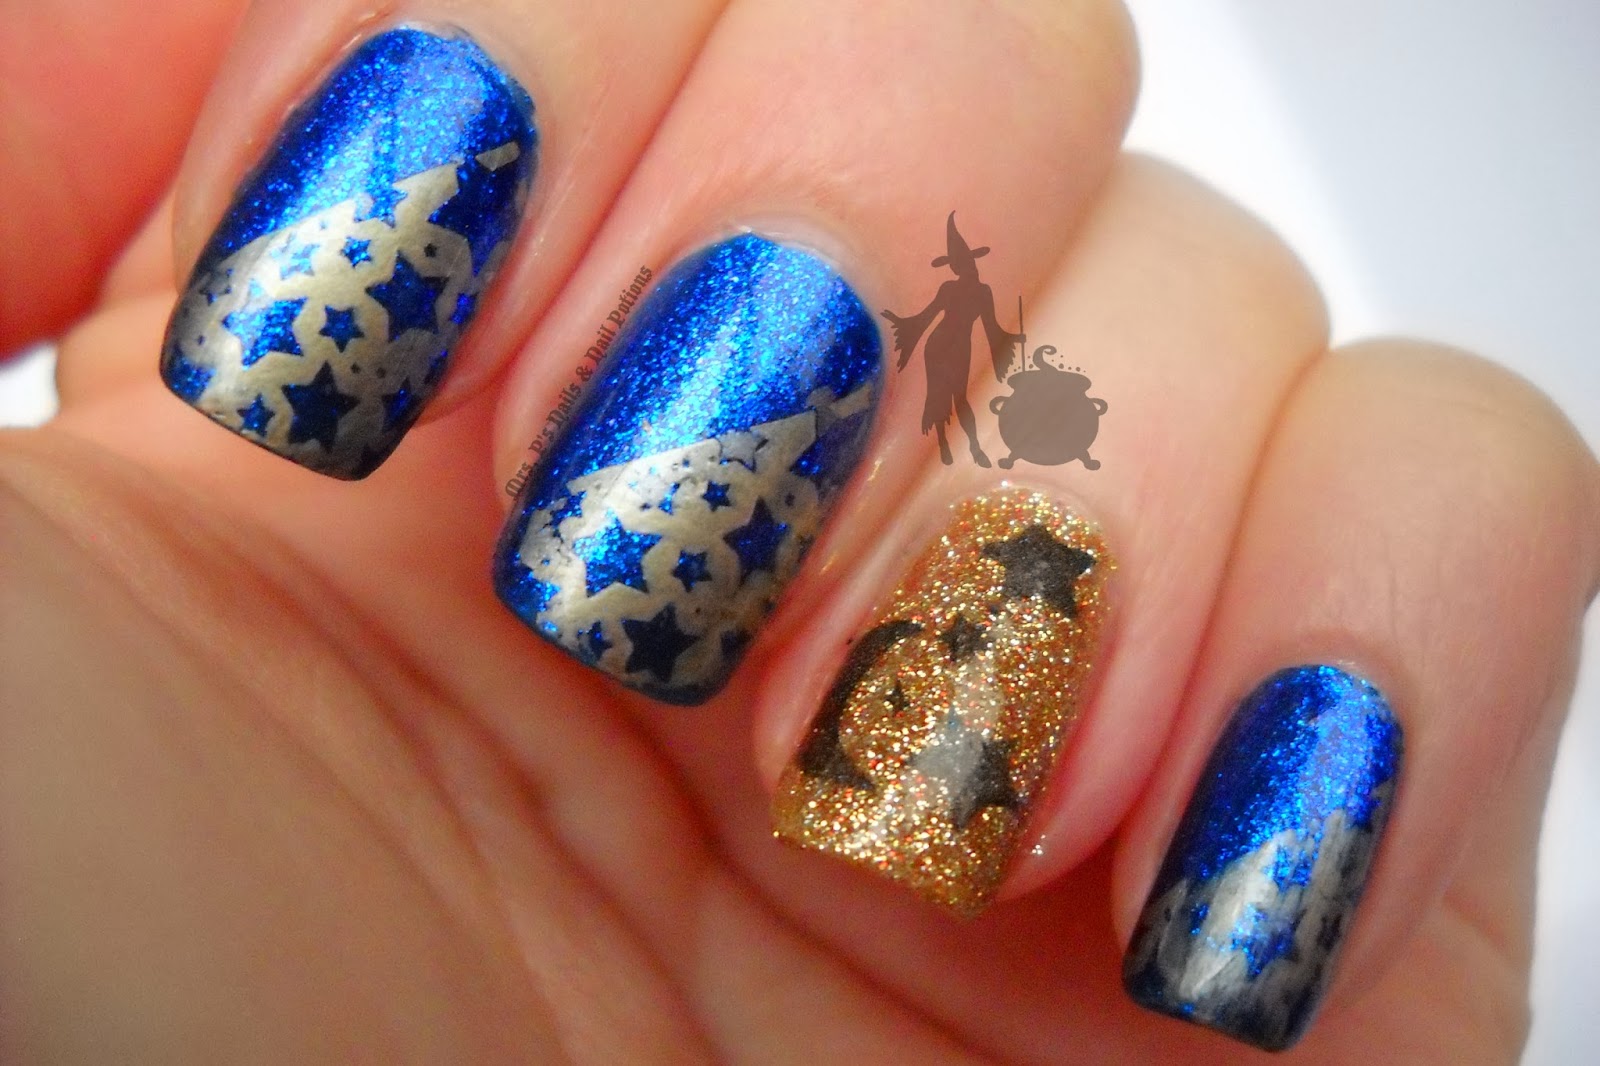
And here's some macros of a few of the nails.

Check out that glitter!!!!!!
I love how shimmery DS Magic is! One of my very first favourite polishes.

After this stamping mani I was HOOKED!  And this was just cheap plates LOL.  I found though that my stamper and scraper from my Dollarama set worked well so I was pleased that I didn't need to buy new ones of those and should just be able to buy new and better plates.  I checked out Nail Polish Canada and got a few plates on sale just to try.  I ordered two Pueen plates and one Bundle Monster plate.  They should arrive Monday.  I'm so excited!!  

Sunday 5 January 2014

Home Decor Inspired Dry Brush Mani

Good evening everyone!  HAPPY NEW YEAR!!!!  I apologize for my absence in my blog posts over the last couple months.  Things got kind of crazy business-wise over the fall and the lead up to Christmas.  And then I basically took the month of December off from the business to spend every moment I could with my husband and children with no distractions.  It was a nice break, especially after the hectic retail season I had.

But I'm back now and one of the things I would like to do for the new year is do more blog posts and more regular blog posts.  Fingers crossed ;)

One of the other things I would like to start doing more of this year is nail art.  I used to do quite a bit before my business started and then when the business took off and I was doing shows and parties, I didn't really find or make time for nail art.  Now I'm no expert but it was fun to do some of the more amateur techniques and it always made for more interesting manicures.

So in an effort to start the new year off right, I am doing this blog post to show you my first nail art of 2014!!  This is my very first attempt at the dry brush technique and I'm quite pleased with it actually.


So as you can see I did the dry brush technique on my index, middle and pinky fingernails.  I had 3 coats of Hella Holo on my accent nails from the previous mani which wasn't all that old and they were still holding up, plus I didn't feel like fiddling with aluminum foil and cotton balls etc. lol, so I decided to leave them.  Blingy accent nails go with any and all manicures anyway, right?!?!

The products I used for the dry brushing are as follows (all Mrs. P's Nail Potions from the Fall 2013 Collection):


My inspiration for the look and colours of the mani was actually some new home decor pieces we had gotten throughout the fall and beginning of winter for our main floor living room:

Ottoman 
Accent cushions
Throw 

I started off with a solid base of Fawning For You (one coat) on all nails.  I then began the dry brush technique:

- Take your first colour (mine was I Guaranteal It) and scrape majority of the polish off of the brush using the neck of the polish bottle.  You can also brush most of the colour off on a paper towel but I didn't want to waste polish and I didn't find a need for the paper towel.  I was able to scrape enough colour off on the neck of the bottle to make the brush pretty much "dry".

- Once you've removed most of the colour off the brush you can gently drag it across the nail, over your base colour.  You can drag in all one direction or in several directions, depending on the look and texture that you want to create (I just did one direction).  You can use more pressure in some areas than others and build up colour in some areas and use less or no colour in others, again depending on the look you want to create.  If you find that no colour is coming off on the nail (only a little should come off) you can dip your brush again and scrape off the excess colour but maybe scrape off a little less than last time.

- Do this to each nail with the same colour until you have done all the nails you wish to have this design.  When you've done your last nail you can move right on to your first nail again with the next colour.  There is no need to wait for dry time as you have put so little polish on and not even full thickness that the polish pretty much dries instantly, and certainly by the time you have done all the desired nails.

- Take your second colour (mine was Lean, Mean & Aubergine) and apply in the same way as you did the first but not necessarily going over all the same brush strokes you just made with the first colour.

- You keep repeating these steps with each colour you have chosen to use until you have achieved a look that you are happy with.

- Once you have a look that you are happy with apply a topcoat and there you have it.

You can do this look with as many or as little colours as you want, layering each colour over the other (you can repeat some colours as well if you want).  This was my first attempt as I had mentioned earlier, and it was very easy and was not time consuming at all.  Took me no more time to do this manicure than it would have to do a simple straight forward manicure with two to three full coats of one colour.

Here are some more views:


Macro of my middle fingernail
Macro of my pinky fingernail
I love how each nail ends up slightly different.  I think next time I do this (and I definitely will do it again!) I will try doing the brush strokes both vertically and horizontally to create a hashtag and more woven type of effect.  And I'm definitely pleased at how well these lacquers worked with this technique.  If you are not already aware, Mrs. P's Nail Potions is my own brand of indie polish that I have created.  I've made all the colours in my Fall 2013 collection very highly pigmented and most can be used as one-coaters with a generous coat, or two coats max.  So they worked well with the dry brush technique as the brush strokes were still highly pigmented enough that you could see the colour that is brushed down and it wasn't sheer or anything.  I wouldn't recommend doing this technique with sheer or jelly polishes, or any other polish that requires several coats to become fully opaque.